Why You’ll Love This Boston Cream Cake Recipe
If you’re looking for a dessert that perfectly balances rich flavors and textures, you’re going to love this Boston Cream Cake recipe.
The combination of a moist vanilla cake, creamy custard, and smooth chocolate glaze creates a truly delightful experience. Each bite offers a satisfying contrast, making it hard to resist!
I can’t get enough of how the layers come together, and the presentation is simply stunning.
Whether you’re celebrating a special occasion or just treating yourself, this cake is sure to impress.
Trust me, once you try it, you’ll find yourself coming back for more!
Ingredients of Boston Cream Cake
When it comes to baking a Boston Cream Cake, the ingredients are key to achieving that delightful balance of flavors and textures. You’ll want to gather a few basic baking staples along with some special items that bring this cake to life. Don’t worry if you’re not a pro in the kitchen; with these ingredients, you’ll feel like a baking superstar in no time.
Here’s what you’ll need to get started on your Boston Cream Cake:
- 1/4 cup butter, softened
- 1 cup sugar
- 3 large eggs
- 2/3 cup milk
- 1 teaspoon vanilla extract
- 1 3/4 cups all-purpose flour
- 2 teaspoons baking powder
- 2/3 cup sugar (for the custard)
- 1/3 cup cornstarch
- 1/4 teaspoon salt
- 2 1/2 cups milk (for the custard)
- 4 large egg yolks, lightly beaten
- 3 ounces chocolate squares
- 1 tablespoon butter (for the glaze)
- 1/3 cup confectioners’ sugar
- 1/4 cup milk (for the glaze)
Now, let’s talk a little about these ingredients. Most of them are probably already sitting in your pantry, which is a huge bonus. The butter and eggs bring richness to the cake, while the sugar adds sweetness.
And don’t underestimate the power of vanilla extract; it’s like a warm hug in cake form. Now, when it comes to the custard, the cornstarch is your best friend. It thickens everything up to that perfect creamy consistency.
And chocolate lovers, rejoice! The chocolate squares and butter in the glaze create that luscious topping you just can’t resist. So, gather your ingredients, roll up your sleeves, and get ready to bake something magical.
How to Make Boston Cream Cake
Making a Boston Cream Cake is like starting a delicious adventure in your kitchen. First things first, you’ll want to preheat your oven to a cozy 350 degrees. While that’s heating up, grab your trusty two 9-inch round cake pans and generously grease and flour them. Trust me, you don’t want your beautiful cake layers to stick. It’s like trying to peel a banana in a hurry; messy and not fun.
Now, in a large bowl, using an electric mixer (or your arm strength if you’re feeling adventurous), beat together 1/4 cup of softened butter and 1 cup of sugar at medium speed. You want this mixture to become light and fluffy, which usually takes about four minutes. Then, crack in 3 large eggs, pour in 2/3 cup of milk, and add 1 teaspoon of vanilla extract. Keep mixing until everything is blended smoothly.
Next comes the dry stuff: add in 1 3/4 cups of all-purpose flour and 2 teaspoons of baking powder. Keep mixing until the batter is well combined; it should be thick and luscious, like a cozy hug in a bowl.
Spoon that beautiful batter into your prepared pans and bake them for about 30 minutes. This is the moment when your kitchen will start to smell heavenly. When you insert a wooden pick in the center and it comes out clean, your cakes are ready to cool on wire racks.
Now, while those layers are cooling, let’s tackle the custard. In a 2-quart saucepan, mix together 2/3 cup of sugar, 1/3 cup of cornstarch, and 1/4 teaspoon of salt. Gradually stir in 2 1/2 cups of milk until smooth, then bring this mixture to a gentle boil over medium heat while stirring constantly. Once it’s thickened, remove it from heat and slowly whisk in 4 lightly beaten egg yolks. Don’t rush this part; you want it silky smooth. Stir in a tablespoon of vanilla, let it cool, and you’ll have a custard that dreams are made of.
Now, for the pièce de résistance—the chocolate glaze. In a small heavy saucepan over low heat, melt 3 ounces of chocolate squares with 1 tablespoon of butter. Stir until it’s a smooth, glossy delight, then whisk in 1/3 cup of confectioners’ sugar and 1/4 cup of milk. Keep it warm and ready for that final flourish.
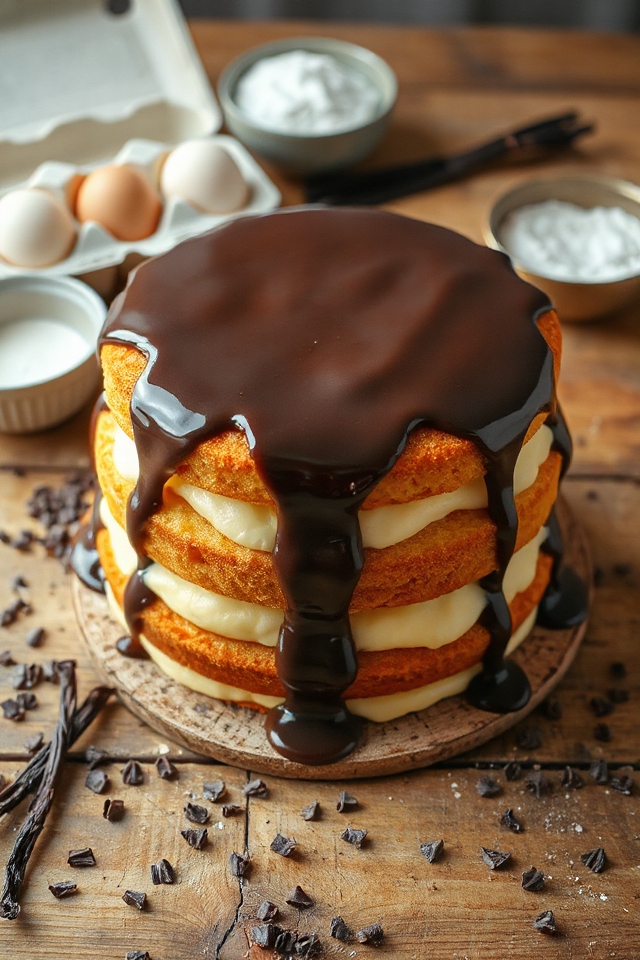
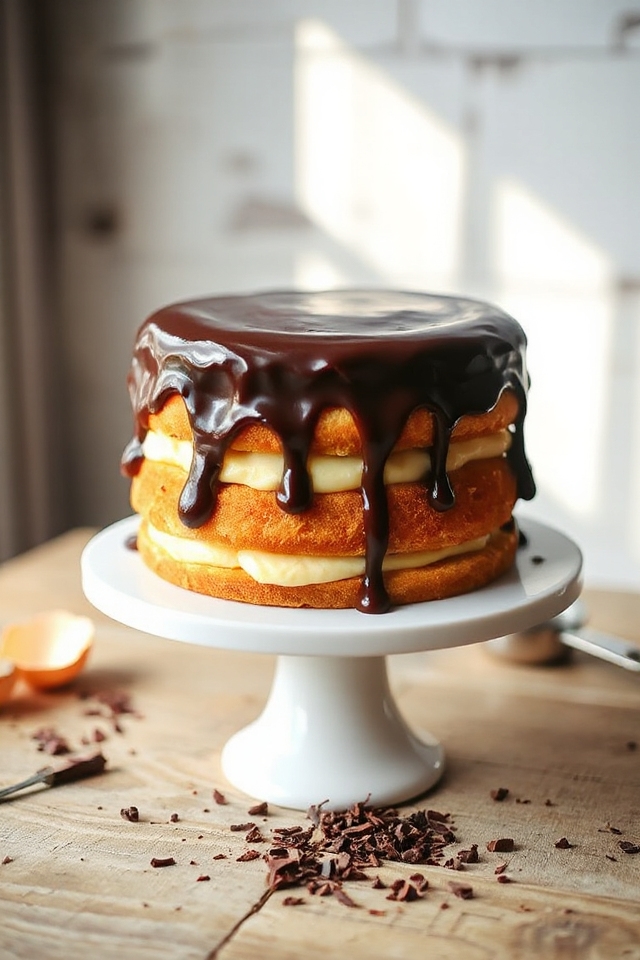
To assemble, carefully slice your cooled cake layers in half horizontally. Place one layer cut-side up on a serving platter, spread it with 1/3 of your cooled custard, and repeat the process until you’ve stacked all the layers. End with the last layer cut-side down, and then drizzle that warm chocolate glaze over the top, letting it drip down the sides like a sweet waterfall.
The result? A stunning Boston Cream Cake that’s sure to impress everyone at the table. And if it doesn’t, well, at least you’d a blast making it.
Boston Cream Cake Substitutions & Variations
While Boston Cream Cake is delicious as is, there are plenty of substitutions and variations you can explore to tailor it to your taste.
For a gluten-free option, try using almond or coconut flour instead of all-purpose. If you prefer a fruitier twist, layer in fresh strawberries or raspberries with the custard.
You could also swap the chocolate glaze for a rich caramel sauce. For a more decadent flavor, consider adding coffee or espresso powder to the custard.
Finally, experiment with different extracts, like almond or hazelnut, to give your cake a unique spin! Enjoy creating your perfect Boston Cream Cake!
Additional Tips & Notes
To guarantee your Boston Cream Cake turns out perfectly, I recommend paying close attention to the baking times and temperatures.
Always preheat your oven and use an oven thermometer to verify accuracy. When baking, avoid opening the oven door too frequently, as this can cause the cake to sink.
Let your cake layers cool completely before assembling; this prevents the custard from melting. For the glaze, keep it slightly warm while pouring to achieve a smooth finish.
Finally, store any leftovers in the fridge, but let the cake sit at room temperature for a bit before serving for the best flavor.