Why You’ll Love This Devil’s Food Cake Recipe
When you take your first bite of this Devil’s Food Cake, you’ll understand why it’s a beloved classic. The rich, chocolatey flavor envelops your senses, and the moist texture is simply irresistible.
Each slice feels like a warm hug, making it perfect for any occasion. I love how easy it’s to whip up, yet it impresses everyone at the table.
The combination of cocoa and cream creates a delightful balance that keeps you coming back for more. Whether it’s a birthday, holiday, or just because, this cake brings joy and satisfaction like no other.
Trust me, you’ll adore it!
Ingredients of Devil’s Food Cake
When it comes to baking, having the right ingredients is half the battle, and for Devil’s Food Cake, it’s all about that rich, chocolatey goodness. This cake isn’t just any cake; it’s a celebration in dessert form.
So, if you’re ready to impress your friends and family (or just treat yourself), let’s plunge into what you’ll need to whip up this delightful treat. Grab your apron, and let’s gather those ingredients!
Ingredients for Devil’s Food Cake:
- 2 cups cake flour (not self-rising)
- 1 teaspoon baking soda
- 1/4 teaspoon salt
- 1/2 cup unsweetened cocoa powder (and a little extra for a delightful frosting)
- 1/2 cup buttermilk
- 2 teaspoons vanilla extract
- 2 large eggs, at room temperature
- 1/2 cup unsalted butter, softened
- 1 cup granulated sugar
- 1 cup packed brown sugar
- 1/2 cup sugar (for the frosting)
- 1 cup heavy whipping cream (for that luscious frosting)
Now, before you dash off to the store, let’s chat about a few things. First off, cake flour is a must for that tender crumb we all love in a cake. If you can’t find it, you can use all-purpose flour, but your cake might be a little heavier.
And don’t skip the buttermilk – it adds a tangy flavor and keeps the cake moist. You can make a quick substitute by mixing regular milk with a splash of vinegar or lemon juice if you’re in a pinch.
Oh, and while we’re at it, remember to bring your eggs to room temperature. It really does make a difference in how well they incorporate.
How to Make Devil’s Food Cake
Alright, let’s roll up those sleeves and plunge into how to make a Devil’s Food Cake that would make even the most serious chocolate lover swoon. First things first, preheat your oven to 350 degrees Fahrenheit and position that rack in the lower third—trust me, you want to avoid any cake disasters.
Grab a 13x9x2 inch baking pan, grease it up with some solid shortening, and dust it with flour. Oh, and don’t forget to line the bottom with parchment or wax paper. This is essential because no one wants their delicious creation to stick to the pan like a bad date.
Now, in a medium bowl, let’s whisk together 2 cups of cake flour, 1 teaspoon of baking soda, and a pinch of salt (just 1/4 teaspoon, to be exact). In another bowl, mix 1/2 cup of lukewarm water with 1/2 cup of unsweetened cocoa powder. Give it a moment to cool down, and while that’s happening, combine 1/2 cup of buttermilk, 2 teaspoons of vanilla extract, and, for good measure, 1/2 cup of water in a liquid measuring cup.
In a large bowl, beat 1/2 cup of softened unsalted butter with a mixer on medium speed until it’s nice and smooth. Gradually add in 1 cup of granulated sugar and 1 cup of packed brown sugar, scraping down the sides of the bowl as you go. This mixture should start to look light and fluffy—like a cloud on a sunny day, if you will.
Once that’s done, it’s time to add the eggs. Crack in 2 large eggs (make sure they’re at room temperature; it really does help) and beat until everything is well combined—this should take about a minute. Now, stir in the cocoa mixture, and then alternate adding your flour mixture and the buttermilk mixture, starting and ending with the flour. This back-and-forth action really helps everything blend beautifully.
Once it’s all mixed and smooth, pour the batter into your prepared pan, spreading it out from the center to create a slightly raised ridge around the edge. Bake for 30 to 40 minutes, and don’t be tempted to open the oven door too soon; no one likes a sunken cake. When it’s done, let it cool for about 10 minutes before flipping it out onto a wire rack.
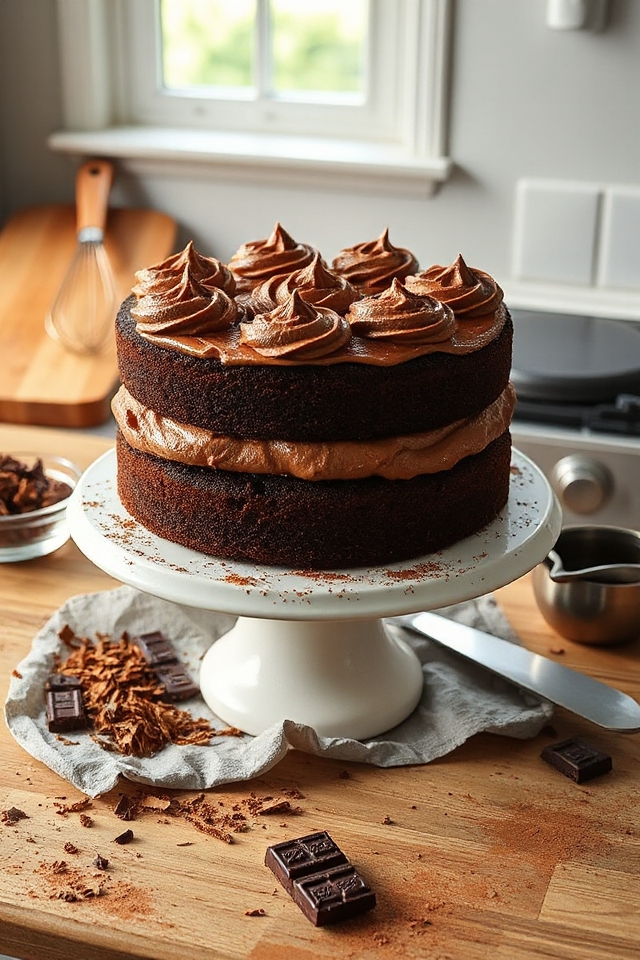
While your cake cools, let’s whip up that dreamy frosting. In a large bowl, mix together 1/2 cup of sugar and 1/4 cup of cocoa powder. Then, pour in 1 cup of heavy whipping cream and stir it all together. Pop it in the fridge for at least 30 minutes; this helps the sugar dissolve nicely.
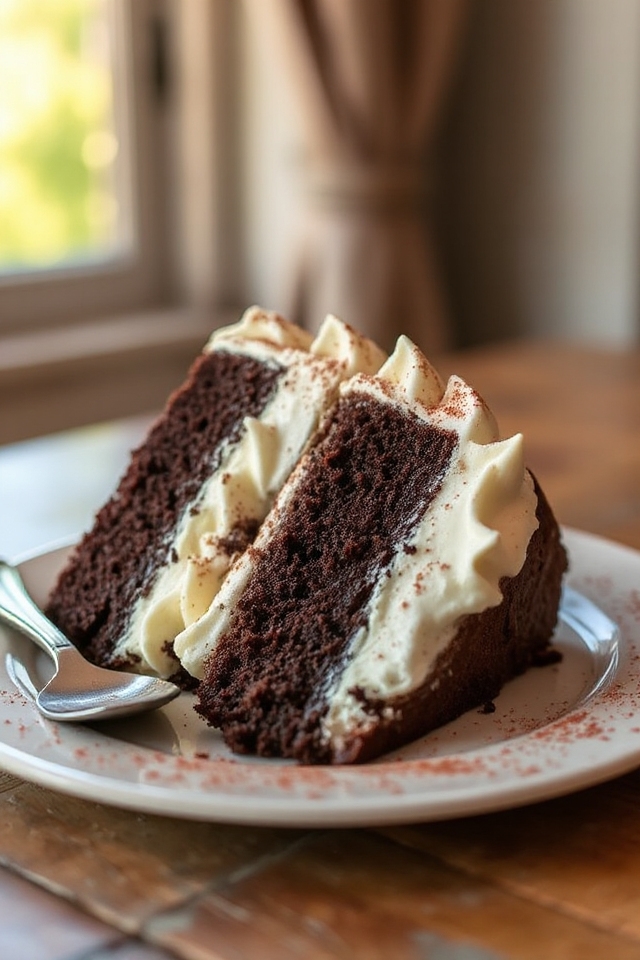
Once it’s chilled, use a mixer to beat it on high speed until you see stiff peaks forming. Now, for the fun part: once your cake is completely cool, trim the ends, cut it into thirds, and layer it with that luscious frosting. You might want to refrigerate it for a bit before serving—just to let all those flavors meld together and create a little magic.
Enjoy every bite, because you’ve earned it!
Devil’s Food Cake Substitutions & Variations
While I love a classic Devil’s Food Cake, there are plenty of ways to customize this dessert to suit your taste or dietary needs.
For a gluten-free option, swap the cake flour for a gluten-free blend. If you’re dairy-free, use almond milk and a dairy-free butter alternative. You can also experiment with different sugars, like coconut sugar for a healthier twist.
Want a richer flavor? Add a splash of espresso to the batter. For a fun variation, mix in chocolate chips or nuts.
These substitutions can elevate your cake, making it uniquely yours while keeping that decadent chocolatey goodness.
Additional Tips & Notes
Customizing your Devil’s Food Cake is just the beginning; a few additional tips can really enhance your baking experience.
Always use room temperature ingredients, especially eggs and butter, for better mixing. Don’t skip the cooling rack; it prevents sogginess.
For an extra touch, try adding a teaspoon of espresso powder to amplify the chocolate flavor. If you’re feeling adventurous, fold in some chocolate chips for added texture.
Finally, refrigerate the cake before serving; it allows the flavors to meld beautifully. Trust me, these simple steps can make your cake unforgettable!
Enjoy baking and indulging in this delightful treat!